Table of Contents
Looking for a show-stopping yet simple dessert for your holiday gatherings?
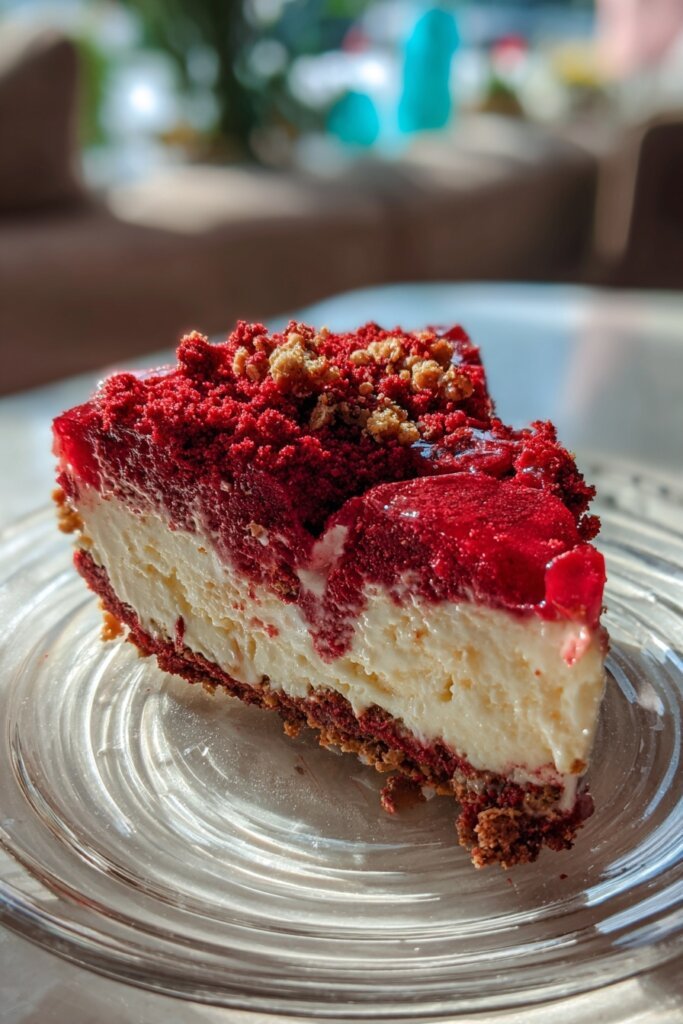
This No Bake Christmas Red Velvet Cheesecake is your answer! It’s an easy, creamy, and festive dessert that comes together in a flash, making it a perfect family favorite for busy moms and professionals. No oven required, just rich red velvet flavor ready to impress!

Why You’ll Love This No Bake Christmas Red Velvet Cheesecake
-
Effortless Elegance: Achieve a stunning, festive dessert without ever turning on your oven, perfect for busy holiday schedules.
-
Vibrant Holiday Hue: The striking red velvet color makes this a beautiful centerpiece for any Christmas table.
-
Rich & Creamy Texture: Indulge in a smooth, decadent cheesecake filling contrasted by a crunchy Oreo crust.
-
Make-Ahead Magic: Prepare this festive dessert a day or two in advance, freeing up precious time on celebration day.
-
Crowd-Pleaser: Both kids and adults adore the classic red velvet flavor and smooth, easy-to-eat texture.
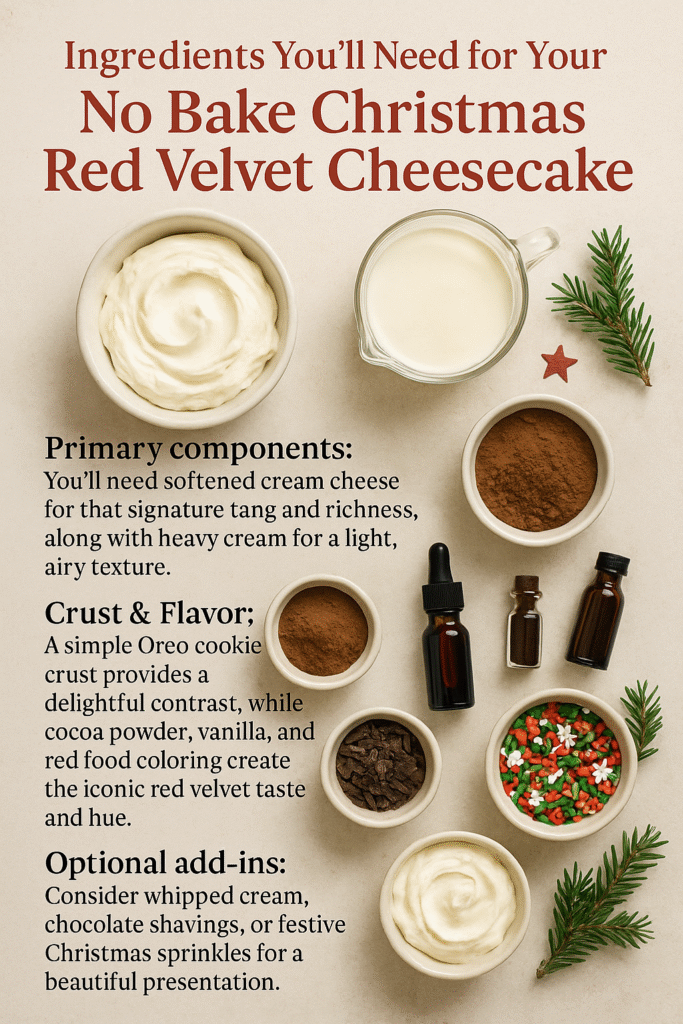
Ingredients You’ll Need for Your No Bake Christmas Red Velvet Cheesecake
Primary components: You’ll need softened cream cheese for that signature tang and richness, along with heavy cream for a light, airy texture.
Crust & Flavor: A simple Oreo cookie crust provides a delightful contrast, while cocoa powder, vanilla, and red food coloring create the iconic red velvet taste and hue.
Optional add-ins: Consider whipped cream, chocolate shavings, or festive Christmas sprinkles for a beautiful presentation.
Note: You’ll find the complete list of ingredients, along with their exact measurements, in the printable recipe card at the bottom of this post. Exact quantities appear in the printable recipe card below.
How to Make No Bake Christmas Red Velvet Cheesecake
Crafting this no bake cheesecake is surprisingly simple! You’ll start by making an easy Oreo crust, then whip up a creamy, vibrant red velvet filling, chill, and finally, garnish for a perfect holiday dessert.
Step 1: Prep the Oreo Crust for Your Festive Dessert
Combine crushed Oreo cookies with melted butter and press firmly into a springform pan. Freeze to set.
Step 2: Prepare the Cream Cheese Base
Beat softened cream cheese in a large bowl until it’s smooth and creamy.
Step 3: Add Flavor and Color to Your Red Velvet Cheesecake Filling
Mix in powdered sugar, cocoa powder, vanilla extract, and red food coloring until the color is uniform.
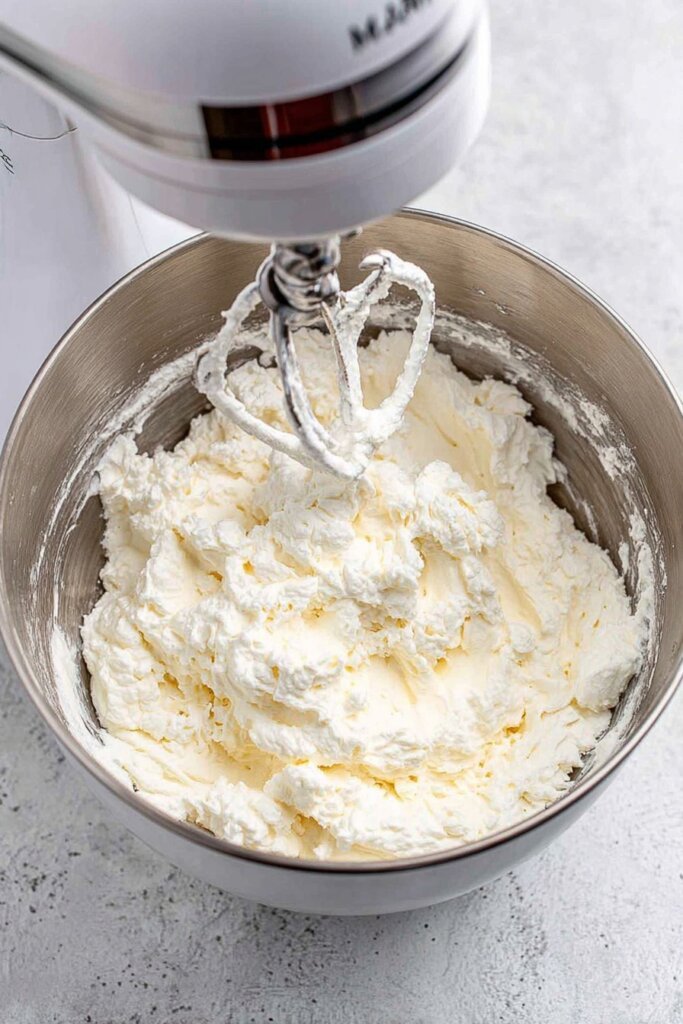
Step 4: Whip the Heavy Cream to Stiff Peaks
In a separate cold bowl, beat cold heavy cream until firm, stiff peaks form.
Step 5: Fold the Whipped Cream into the No Bake Christmas Red Velvet Cheesecake Mixture
Gently fold the whipped cream into the red velvet cream cheese mixture until just combined.
Step 6: Assemble and Chill Your No Bake Christmas Red Velvet Cheesecake
Pour the filling over the crust, smooth the top, cover, and refrigerate for at least 4-6 hours, or overnight.
Step 7: Garnish and Serve Your Creamy No Bake Cheesecake
Carefully remove from the pan, then garnish with whipped cream, chocolate, and sprinkles before slicing.
Pro Tips for Making the Best No Bake Christmas Red Velvet Cheesecake
-
Room Temperature Cream Cheese: Ensure your cream cheese is fully softened for a smooth, lump-free filling.
-
Gel Food Coloring is Key: Use gel food coloring for a vibrant, rich red color without adding excess liquid.
-
Don’t Overmix the Whipped Cream: Beat heavy cream until just stiff peaks form to prevent a grainy texture.
-
Gently Fold: When combining whipped cream with the cheese mixture, fold gently to maintain the airy texture.
-
Chill Time is Crucial: Allow ample refrigeration time (preferably overnight) for the cheesecake to firm up properly.
-
Easy Release: Run a thin knife around the edge of the springform pan before releasing for clean slices.
Final Thoughts
This No Bake Christmas Red Velvet Cheesecake is truly a holiday hero! It delivers all the rich flavor and festive charm you desire with minimal effort.
If you love the rich cocoa flavor of red velvet, you’ll definitely want to check out the red velvet layer cake. It shares that same velvety texture and festive color, making it a perfect complement to this creamy no-bake cheesecake.
FAQs
Can I make this No Bake Christmas Red Velvet Cheesecake ahead of time?
Absolutely! This cheesecake can be made up to 2 days in advance, making it an ideal make-ahead holiday dessert. Store it covered in the refrigerator.
What if I don’t have a springform pan?
While a springform pan is ideal for easy removal, you can use a regular 9-inch pie plate. Line it with parchment paper leaving an overhang to lift the cheesecake out.
Can I use regular food coloring instead of gel?
Yes, but gel food coloring provides a much more vibrant red with less liquid, which is crucial for the cheesecake’s consistency.
How long does No Bake Christmas Red Velvet Cheesecake last?
Store any leftovers in an airtight container in the refrigerator for up to 3-4 days.

No Bake Christmas Red Velvet Cheesecake easy creamy family favorite
- Total Time: 4 hours 25 minutes
- Yield: 10–12 servings 1x
- Diet: Vegetarian
Description
This No-Bake Christmas Red Velvet Cheesecake is a festive and easy dessert that’s perfect for the holidays. With its vibrant red color and creamy texture, it’s sure to be a showstopper at any gathering. The rich red velvet flavor is complemented by a crunchy Oreo crust, making it a family favorite.
Ingredients
- For the Crust:
- 24 Oreo cookies, finely crushed
- 1/2 cup (113g) unsalted butter, melted
- For the Cheesecake Filling:
- 2 (8-ounce) packages cream cheese, softened
- 1 1/2 cups powdered sugar
- 1/4 cup unsweetened cocoa powder
- 1 teaspoon vanilla extract
- 1/2 teaspoon red food coloring (gel preferred for vibrant color)
- 1 cup heavy cream, cold
- For the Garnish (Optional):
- Whipped cream
- Chocolate shavings
- Christmas sprinkles
Instructions
- Make the Crust: In a medium bowl, combine the crushed Oreo cookies and melted butter. Press the mixture firmly into the bottom of a 9-inch springform pan. Place in the freezer to set while you prepare the filling.
- Prepare the Cheesecake Filling: In a large bowl, using an electric mixer, beat the softened cream cheese until smooth and creamy.
- Add the powdered sugar, cocoa powder, vanilla extract, and red food coloring to the cream cheese mixture. Beat until well combined and the color is uniform.
- In a separate cold bowl, beat the cold heavy cream with an electric mixer until stiff peaks form.
- Gently fold the whipped cream into the red velvet cream cheese mixture until just combined. Be careful not to overmix, as this can deflate the whipped cream.
- Assemble and Chill: Pour the cheesecake filling over the prepared Oreo crust in the springform pan. Smooth the top with a spatula.
- Cover the springform pan with plastic wrap and refrigerate for at least 4-6 hours, or preferably overnight, until the cheesecake is firm.
- Garnish and Serve: Once set, carefully remove the cheesecake from the springform pan. Garnish with whipped cream, chocolate shavings, and Christmas sprinkles, if desired. Slice and serve cold.
Notes
- For a deeper red color, you can add a tiny bit more red food coloring, but be mindful that too much can alter the taste.
- Ensure your cream cheese is at room temperature for a smooth, lump-free filling.
- Using a gel food coloring will give you a much more vibrant red than liquid food coloring.
- This cheesecake can be made up to 2 days in advance, making it a perfect make-ahead holiday dessert.
- Store any leftover cheesecake in an airtight container in the refrigerator for up to 3-4 days.
- Prep Time: 25 minutes
- Cook Time: 0 minutes
- Category: Dessert
- Method: No-Bake
- Cuisine: American
Nutrition
- Serving Size: 1 slice
- Calories: 450
- Sugar: 35g
- Sodium: 220mg
- Fat: 30g
- Saturated Fat: 18g
- Carbohydrates: 40g
- Fiber: 1g
- Protein: 5g
- Cholesterol: 90mg